


Step 1. This is my good friend Christel, who was kind enough to wake up at 6 am for a 7 am starting time on this makeup job.
Step 2. This was my first attempt at doing this "near full" skeleton makeup, and I decided it would be best to start working on the feet and the legs first, leaving Christel more time to not have to endure the makeup on her face.
I applied Ben Nye WHITE cake makeup, using a sea sponge- it dosen't have to be ultra thick- in fact you want to spread it out so it dosen't leave clumps of makeup.
Step 3. Once the white base was applied, I started roughing in the bone structure, using my Paasche VL airbrush and Brown air opaque water based paints made by Badger. I had a book on anatomy open for reference as I was painting the leg bones.
Step 4. Here I started roughing in the feet bone structure, again referring heavily to the anatomy book. Too many bones here to try and memorize 'em all.
Step 5. Once I had the rough bone structure painted in brown, I switched to Black (same Badger Air Opaque water based paints) and work over the top of my brown roughs. This time I am being much more meticulous and detailed, and adding the blacks between the bones.
Step 6. Finished with the feet, I moved on to the leg bones. Again, working in as many details as possible.
Step 7. Christel gives the sign of approval on the detailed legs. Time to move on to the face.
Step 8. Back to the Ben Nye WHITE cake makeup, applying it again with a sea sponge. No need to get the white right up to the edges of the eyes, as the eye sockets will later be blackened. I try to cover the lips with a white base, to try and help the black adhere a little bit better when the time comes.
Step 9. With the white base finished on the face, I move back to the airbrush and rough in the skull features using the Badger AirOpaque Brown again to start. I almost always start working on the eyes first, then move to the nasal cavity. Here, I have filled
in the eye sockets with brown, outlined the nasal cavity, and added just a touch of brown to the lips.
Step 10. Once I got all of the brown roughs for the skull in place, I switch to black again to start detailing. When working on Skulls, you will definitely want the anatomy book open again. I also use a small resin skull model that I hold in my left hand as I paint for reference. If you are trying to make the skull look real rather than cartooninsh, the more reference material you have, the better. I start the details with the eyes again. I try to establish a good solid black outline around the eye socket. Working on the eyes requires some practice- if you make the eye sockets too big, the skull looks cartoonish. The face usually provides a lot of good visual clues as to where to put the outline of the eyes. Practice! The same applies to the nasal cavity- without good reference material, you may end up trying to blacken the entire nose, which will leave you with a sort of Puppy Dog face. I try to leave a subtle line down the center of the nose, as an indication of the bone dividing the nasal cavity. With the nose and eyes finished, I move on to the upper jaw line. Starting at the center of the ear, I paint a solid black line across the face toward the nose. I try to estimate how much space will be needed to drop in the teeth/molars, and end my line usually right below the center of the eye. Again, a lot of the feel for this comes through practice. I painted a lot of skulls at the haunted house I used to work at before this process became simple for me. Once I get the upper jaw line painted in, I then work on the lower jaw, painting a solid black line across the bottom of the lower jaw.
Step 11. After repeating the steps for the jaw lines on the right side of the face, I am now ready to start adding the teeth. This is always a fun step because you have to deal with airbrushing over the mouth- too much pressure and you end up filling up the models mouth with a blast of air, which always results in a laugh from the model because of the funny noise it produces. I try to reduce the pressure a bit for this step. I start by applying a black line across the bottom lip to establish definition between the upper and lower teeth. With that line in place, I then start adding the teeth, by starting directly below the nose. I paint a vertical black line starting on the upper lip and moving to the lower lip. This helps me center the teeth. I Then start painting more vertical lines on either side of the first line, trying to keep them spaced evenly. I try to create 4 to 6 incisors this way, then I work in the molars. Once the teeth are in place, I do some softening on the edges of the teeth with the airbrush, and add a few soft vertical line on the the area between the upper teeth, to try and establish some form in the skull. I also add some subtle details, such as small fissure cracks from the eye sockets.
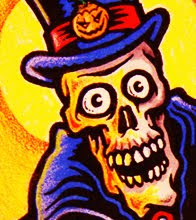
Step 12. The blacks and browns are finished, so to "warm" up the skull a bit, I lightly "dust" on some yellow (same Badger air opaque water based paints.). The skull is now finished.
Step 13. Time to start working in the neck bones and the rib cage. I apply the base white with the Ben Nye, then move to the brown roughs with the airbrush again. I do the same on the arms and the hands and fingers. Reference material again!!
Step 14 & 15 - Back to adding the details with the black. I keep adding details along the way, until everything has been detailed.
At this point, the project is pretty much finished, with the exception of some final bits, such as painting the backs of the arms and legs, and I also apply a thin red line under the eyes, using a brush and Ben Nye grease paints (Fresh Cut).
I spray the entire makeup with a light spray of Ben Nye Final Seal, and then we are off to the photo shoot. If you really want to capture the makeup job, it makes a world of difference to hire a pro photographer!
This project took about 7 to 8 hours total, and probably could have been condensed down quite a bit, but this was the first time I had attempted this, and we did take a lunch break during the process. Hopefully the next time around it will go quite a bit faster.
Let me know if this was useful or not, and if I need to clarify anything here. It's not easy to explain all of this- much easier to explain it in person, but... Hopefully this works!
5 comments:
Wow. That is intense. Did she just wash it off that night? I hope you got tons of pictures... which it appears you did. It looks really good! And.... no I don't really read comics anymore, which is sad. They just got too addictive, and therefore quite expensive. I may go pick up some graphic novels soon... When are we all going to have an art competition? I know Eric and Jared would go in. Winner gets a free rib dinner at their BBQ joint of choice?
Yeah, Christel tried to keep the makeup on as long as possible- she actually went to a dinner party with her family that night with the makeup still on, and scared some of the kids pretty good! Thanks for the kind words, it was a fun project, and took much longer than it should have. We are getting ready for a sequel photo shoot soon- waiting on a costume designer... I was just razzing you about the comic books. I still pick a few up from time to time, but they mostly lack the spirit of the classics- so I find good online sites like "The horrors of it all" that post vintage horror comic stories. I am always down for some art competition, guess we just need to organize it and go for it. Is Jared back from his Honeymoon yet? I would hope so!
Totally awesome...
Wow, that is a very kick ass effect. I may have to do something like this for Halloween this year...
thats awesome! my friend and i are gonna try that for halloween or at least something like that though i think she is just going to do half her body!
Post a Comment